Monday, February 6, 2012

Laundry Soap

The other day my friend told me I was one of those mom's that people think are crazy. Uh, thanks? There was no offense intended, but I understood what she meant. Sometimes it seems we don't have an extra minute and making your own laundry soap seems like one extra thing on your never ending to do list. However, this recipe is easy, 20 minutes start to finish and you will be saving money.
You will need:
2 cups Borax
2 cups Washing Soda (not baking soda)
2 bars mild soap (felsnaptha, ivory, dove)
2 cups Oxygen Cleaner (oxyclean, awesome oxygen cleaner) I got mine at the dollar store it is the exact same ingredients as oxyclean.
First grate your soap,this is the longest step.
Once the soap is all grated add to all the other ingredients and mix together. Once mixed turn it into a powder using a food processor (you don't have to do this, I just like mine powder; I think it dissolves better)
Powdered soap!
Put in a labeled canister, anything with a lid will work.
Use 2-3 TBS each load. I use 4 on heavily soiled clothing.

This soap works very well, I love it!

Thursday, February 2, 2012

Veggie Tacos

You know how when you plant a zucchini plant you end up getting a million? This summer I planted 3! What was I thinking? Luckily I found some new ways to use all the zucchini we were blessed with. Just a warning this is a sort of made up recipe but it is really good.


You will need:
Olive Oil
3 Medium Zucchini
3 large carrots
2 medium baking potatoes (any potato is fine, even sweet potatoes)
3-4 TBS taco seasoning
Salt and Pepper (optional)
Cheddar Cheese (not pictured, I always forget something)
Crunchy Taco Shells or Tortilla chips
First grate all of your veggies and heat 1-2 TBS olive oil in a skillet on medium/low.
Add your veggies and saute 6-8 minutes. Or until cooked down and colors have darkened.
Once veggies have cooked down add taco seasoning. Cook about 5 minutes more.
Add cheese and wait for it to melt. Once melted sir together. Cook on medium heat until desired crispiness is reached. I like mine semi-crispy.
Spoon into a crunchy taco shell or eat with tortilla chips. Top with sour cream, salsa or your favorite topping.
This stuff is also really good cold.

Fabric Softener

Did you know you can make your own fabric softener? I didn't so I tried out this recipe and decided to share it. You will need:
6 cups hot water
3 cups white vinegar
2 cups hair conditioner (I used suave because I had it on hand. You could use any conditioner you want, you could even use organic or all natural)

Directions:
Add the hair conditioner to the hot water and mix until the conditioner is dissolved. Add the vinegar and mix all ingredients well. Pour mixture into an old bottle of mason jar (I had to use both, it makes a lot).
To use:
Add 2-3 TBS to you fabric softener dispenser and wash. *For me 1/2 cap measured 3 TBS.


Wednesday, March 9, 2011

Paper rose wreath

This project is from Valentine's Day (hmmm, a month late). Anyway, I love how this turned out. I purchased a wood heart wreath at Deseret Industries a few years ago and it had been sitting in a craft box in the garage ever since. I saw a tutorial for crepe paper rose flowers over at House of Smiths(I love that blog) and made this cute wreath for my Valentine decor.

Just so you know, it took about eight hours and lots of glue gun burns to make all of the roses. Go to http://www.thehouseofsmiths.com/2010/02/hanging-roses-i-was-browsing-blogs.html for the tutorial on making the roses.


Monday, March 7, 2011

Cupcake stand.

A while ago I saw a tutorial for a cupcake stand over at Skip to My Lou.
The other day at Target I saw these plates and decided we needed a cute spring cupcake stand at our house.
Can't beat the price. I really like the way it turned out. My kitchen is decorated in lemons and limes so it works well with my color scheme.


Don't mind the crappy bench picture. Another project on my never ending list!
Check out the tutorial for this stand at Skip to my Lou:


Shelf

I rarely have ideas of my own. Thank goodness there are so many craft blogs out there to help me out.
I found the idea for this shelf over at House of Smiths:
http://houseofsmiths.blogspot.com/2010/09/ballard-design-inspired-shelves.html
Check out the link for the tutorial.
Shelly calls it her "wanna-be-mantel" shelf. I liked the idea and put my true love to work. We had almost all of the supplies. We had to purchase the brackets. Total out of pocket was around 16.00.

Thursday, February 24, 2011

Flower window

A while ago I noticed one of these beauties hanging in my friends home and I had to have one. They are so easy to make!
Supplies:
An old window (I got mine at an antiques store for $8)
Sander and sandpaper
Paint of your choice
Wood stain
A piece of wood cut to the size of your window
Dried flowers
Moss
Hot glue gun
Screws (measure to make sure they are not too long)

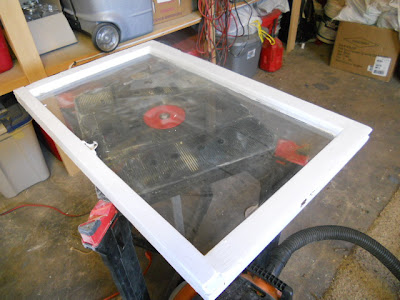
My window, not to pretty.

#1- Sand off all paint, and wear a mask who knows how much lead is in 100 year old paint.


#2- Paint your window frame. I painted mine white, it is something I had on hand and it matches with anything.


#3-Sand edges for a distressed look. Apply a small amount of wood stain to exposed wood around the edges.
#4- Paint the wood for the back of your frame. ( I don't have a picture of this. My true love cut a piece of scrap wood so it was the same size as the window frame)

#5- Arrange your flowers on your painted backing. Hot glue the stems at the end. Glue moss over ends to hide the glue globs holding your flowers.
#6- Place window on top of backing and flowers. Flip over window and screw backing to window.

And your done.
All for around $10.oo.


I made this one for my home about a year ago (sorry about the picture quality).
I used some leftover bead board for the backing.


This one was made for my in laws. They loved it!