Just so you know, it took about eight hours and lots of glue gun burns to make all of the roses. Go to http://www.thehouseofsmiths.com/2010/02/hanging-roses-i-was-browsing-blogs.html for the tutorial on making the roses.
Wednesday, March 9, 2011
Paper rose wreath
This project is from Valentine's Day (hmmm, a month late). Anyway, I love how this turned out. I purchased a wood heart wreath at Deseret Industries a few years ago and it had been sitting in a craft box in the garage ever since. I saw a tutorial for crepe paper rose flowers over at House of Smiths(I love that blog) and made this cute wreath for my Valentine decor.
Just so you know, it took about eight hours and lots of glue gun burns to make all of the roses. Go to http://www.thehouseofsmiths.com/2010/02/hanging-roses-i-was-browsing-blogs.html for the tutorial on making the roses.
Monday, March 7, 2011
Cupcake stand.
A while ago I saw a tutorial for a cupcake stand over at Skip to My Lou.
The other day at Target I saw these plates and decided we needed a cute spring cupcake stand at our house.
Shelf
I rarely have ideas of my own. Thank goodness there are so many craft blogs out there to help me out.
I found the idea for this shelf over at House of Smiths:
http://houseofsmiths.blogspot.com/2010/09/ballard-design-inspired-shelves.html
Check out the link for the tutorial.
Shelly calls it her "wanna-be-mantel" shelf. I liked the idea and put my true love to work. We had almost all of the supplies. We had to purchase the brackets. Total out of pocket was around 16.00.
Thursday, February 24, 2011
Flower window
A while ago I noticed one of these beauties hanging in my friends home and I had to have one. They are so easy to make!
An old window (I got mine at an antiques store for $8)
Sander and sandpaper
Paint of your choice
Wood stain
A piece of wood cut to the size of your window
Dried flowers
Moss
Hot glue gun
Screws (measure to make sure they are not too long)
My window, not to pretty.
#1- Sand off all paint, and wear a mask who knows how much lead is in 100 year old paint.
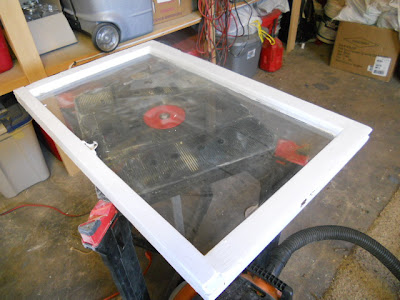
#2- Paint your window frame. I painted mine white, it is something I had on hand and it matches with anything.
#1- Sand off all paint, and wear a mask who knows how much lead is in 100 year old paint.
#2- Paint your window frame. I painted mine white, it is something I had on hand and it matches with anything.
#3-Sand edges for a distressed look. Apply a small amount of wood stain to exposed wood around the edges.
#4- Paint the wood for the back of your frame. ( I don't have a picture of this. My true love cut a piece of scrap wood so it was the same size as the window frame)
#5- Arrange your flowers on your painted backing. Hot glue the stems at the end. Glue moss over ends to hide the glue globs holding your flowers.
#6- Place window on top of backing and flowers. Flip over window and screw backing to window.
And your done.
And your done.
All for around $10.oo.
Baby Wipes
I am cheap, super cheap. I hate spending money on things that I can make for a better price. Since my second child was born I have been making homemade baby wipes. They are cheap, smell good, only take 15 minutes and get little bums clean. Although on occasion I do purchase store wipes I just prefer to use my homemade ones. Plus, when you can get three rolls of paper towels for 2 dollars it makes each box $0.33 a piece.
An old wipe box
paper towels (I buy the "choose your size" kind)
2 cups of water
1 TBS baby oil
1 TBS baby shampoo
Tear off half of your roll of paper towels.
Fold them in thirds and stack with the folded flap down.
Flip so folded side is up and place in wipe box.
Stir baby oil and shampoo in water.
Pour over your paper towels.
*If you need more liquid just add more water. If wipes are too wet leave lid open over night*
Tuesday, February 22, 2011
Subscribe to:
Posts (Atom)